Protocol for Aldehyde-Stabilized Cryopreservation (ASC)
Table of Contents
aurellem ☉
Aldehyde-stabilized cryopreservation (ASC) is a brain-banking technique for connectomics research which is able to preserve every single synaptic connection in a whole brain. I developed this technique while working at 21st Century Medicine during 2015, though the idea of cryoprotecting aldehyde-fixed tissue has been around in various forms for over 30 years, being first described in Eric Drexler's book Engines of Creation (Drexler-1986). ASC won the Brain Preservation Foundation's small mammal brain preservation prize on February 9th, 2016.
If you're interested in a detailed, succinct, peer-reviewed account of aldehyde-stabilized cryopreservation, I recommend you read the short, open-access article about ASC I've published in the journal Cryobiology (McIntyre-2015). You can get the article for free here:
http://dx.doi.org/10.1016/j.cryobiol.2015.09.003 (local-backup)
This article is meant to compliment the paper by providing a very detailed description of how to do aldehyde-stabilized cryopreservation in your own lab. You'll find detailed lists of chemicals and equipment and where you can buy them, as well as commentary on modifications to ASC that you might try.
Why might you want to use aldehyde-stabilized cryopreservation?
- ASC allows for unlimited storage times, allowing you to more efficiently structure your experiments. I've found even in my own very simple experiments that's its very convenient to preserve multiple animal brains and then batch process them for electron microscopy. You can keep unique brains such as those of very old or genetically modified animals. You can also keep a permanent record of brains from critical experiments without worrying about their decay over time.
- ASC works on whole brains, allowing you to study more brain regions. Even if you're only interested in a particular brain region initially, ASC gives you the option to revisit the rest of the brain for further analysis at a later date.
- Your post-processing protocols are almost certainly compatible with ASC. Since you can remove the cryoprotectant from the brain by either diffusion or perfusion, you can use any protocol that's compatible with an aldehyde-fixed brain.
- It's easy to incorporate ASC into a standard fixation protocol. If you are already set up to do transcardiac perfusion fixation, then you already have almost everything you need to do ASC. ASC can generally be included under existing approved animal fixation protocols as "additional processing" after euthanasia, because everything about ASC that's different from standard fixation happens after the animal is dead.
High-level overview of aldehyde-stabilized cryopreservation protocol
First, fix the animal's brain exactly the same as if you were preparing it for trational resin embedding and electron microscopy. In short, this involves anesthesia, carotid cannulation, blood washout, and finally perfusion fixation with glutaraldehyde.
After the brain is fixed, you need to get enough cryoprotectant into the brain to enable vitrification. However, the blood-brain barrier (BBB) continues to work after the brain is fixed, presenting a huge problem: As long as the blood-brain barrier is intact, it will greatly impede the flow of cryoprotectant into the brain's cells. If you try to perfuse cryoprotectant in anyway, you can eventually get enough in to enable vitrification, but at the cost of shrinking the brain to about 2/3 of its original size. Fortunately, since the glutaraldehyde has strengthened the brain, you can perfuse Sodium Dodecyl Sulfate (SDS), a surfactant used in laundry detergent, to permeabilize the blood-brain barrier and allow cryoprotectant to pass freely into the brain's cells (Saija-1997, Yuri-2007). The glutaraldehyde protects the brain from any structural damage from the SDS.
With the blood brain barrier neutralized, you can cryoprotect the brain without any problematic dehydration. Recirculate fixative and slowly increase the concentration of ethylene glycol over the course of 4 hours until the ethylene glycol concentration is at 65% weight/volume. After maintaining this concentration of ethylene glycol for another hour, the brain is fully cryoprotected and ready for vitrification. The glutaraldehyde protects the brain from any structural damage from the cryoprotectant, enabling you to use a massive amount of ethylene glycol and to perfuse at room termperature for the several hours it takes to fully cryoprotect the brain. Without the glutaraldehyde, the combination of 65% w/v ethylene glycol and room temperature perfusion would totally destroy the brain.
Once the brain has been fully cryoprotected, you can simply throw it into a biological freezer set to -135°C and wait a few hours for it to vitrify. 65% ethylene glycol forms a thermodynamically stable glass (Wowk-2010), so there's no need to worry about the cooling rate, because ice will never form regardless of the rate you use. The same is true for rewarming: the glass's thermodynamic stability allows it to return to room temperature at any warming rate without devitrification. I generally set ASC brains out in a fume hood for about an hour to warm them. Aain, the only reason we are able to use such a stable glass is because the glutaraldehyde strengthens the brain and prevents what would otherwise be severe structural damage from the high concentrations of ethylene glycol.
The rest of this document goes into great detail concerning accomplishing the steps described above.
Perfusion Machnies
Parts List
First off, I don't recommend you buy this equipment directly from the links I've provided here. You can get this equipment for much cheaper on eBay, as surplus from labs, or from clearance sales from biotech and pharma companies. You can also make subistutes for many of these things yourself, or repurpose other equipment. I've listed the equipment that I actually used for my experiments here and linked to the original manufacturer's website for reference. In the case where equipment I used is no longer being made, I've listed suitable replacements.
Masterflex L/S Economy Drive

- available at masterflex for $706
Masterflex L/S Digital Drive
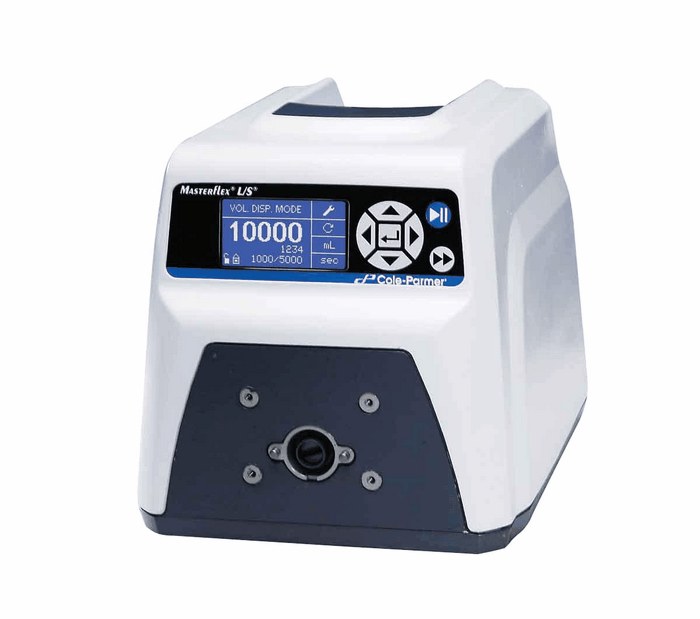
- available at masterflex for $2037
Masterflex L/S Easy Load Pump Head

- available at masterflex for $233
Masterflex Platinum-Cured Silicone Tubing, L/S #14
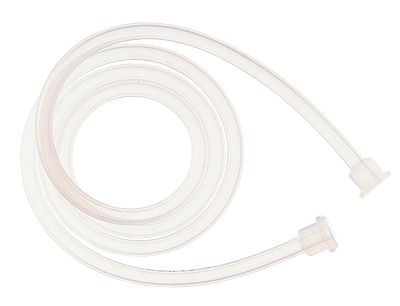
- available at masterflex for $123 / 3 meters
This tubing is for the pump heads and is specally designed to survive hours of pumping action. L/S #14 is the right size to adequately perfuse the average rabbit head while still providing a good dynamic range of flow rates. If you're going to perfuse something smaller like a mouse, consider using L/S #13 tubing. I also built the cannulae support structures using L/S #13 tubing.
Standard Silicon Tubing (approx. L/S #16)
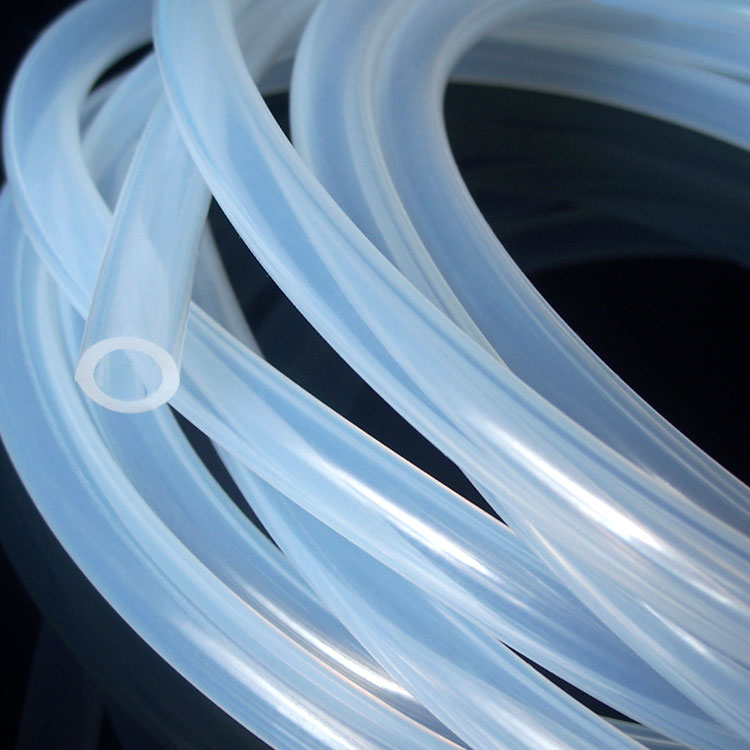
This is standard silicon tubing for use everywhere in the circuits EXCEPT for the pump heads.
- available at Spectrum for $198 / 15 meters
Electronic Pressure Transducer

- available at cdiweb (made by meas-spec) for $154.02
Stainless Steel Filter Holder
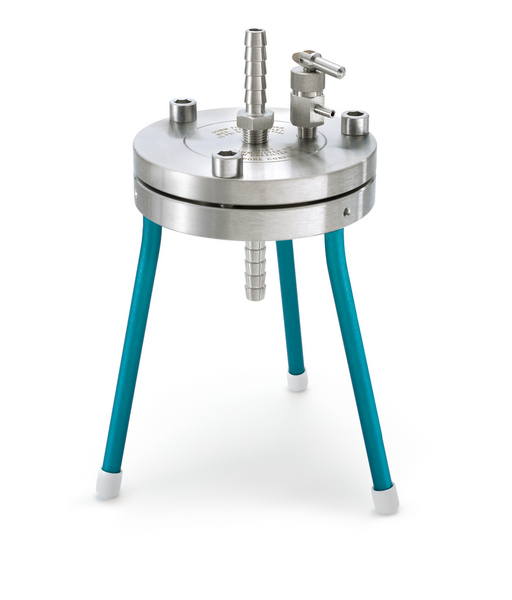
- available at millipore for $1130
Perfusion Machine Construction
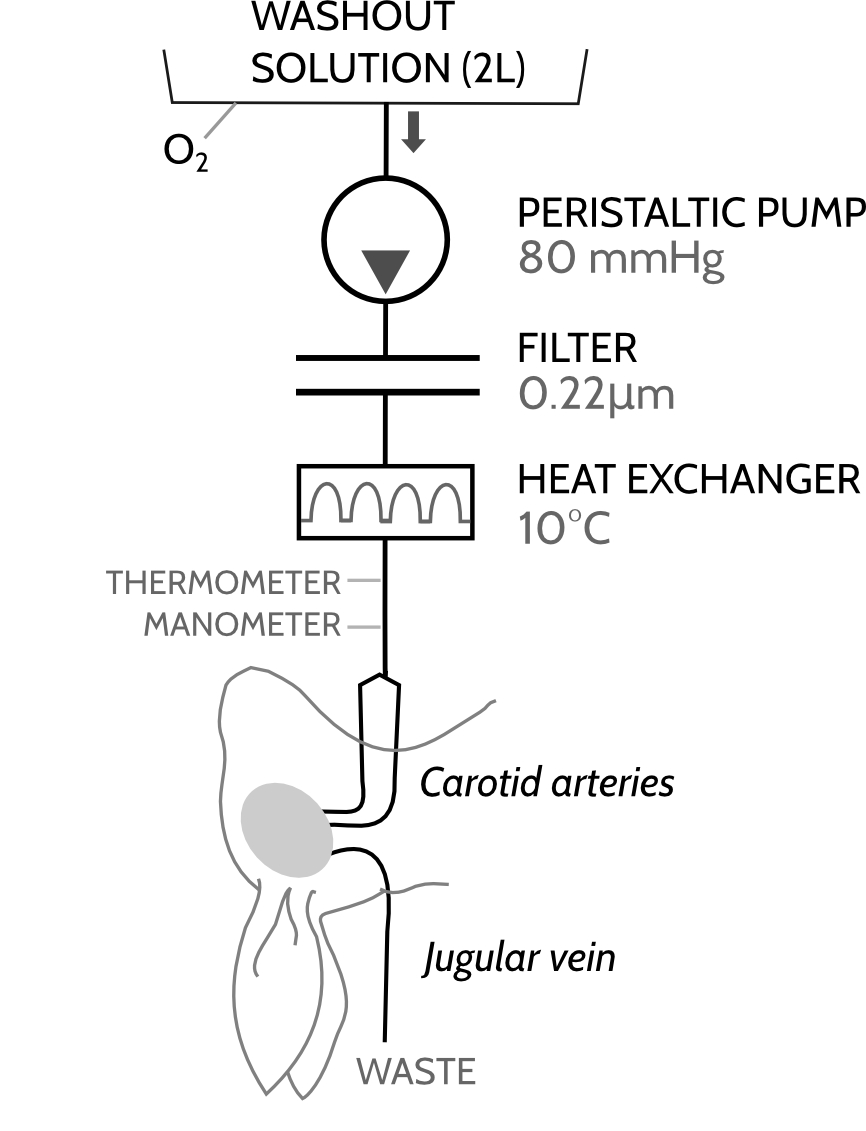
Figure 8: The purpose of the washout circuit is to remove blood from the rabbit's brain and replace it with washout solution. It is necessary to remove all the blood, because any blood that is left in the brain once fixation starts will itself be fixed and clog whatever blood vessel it is in. Practically, it's also useful for this circuit to be mobile so that you can move the rabbit head to a fume hood for fixation.
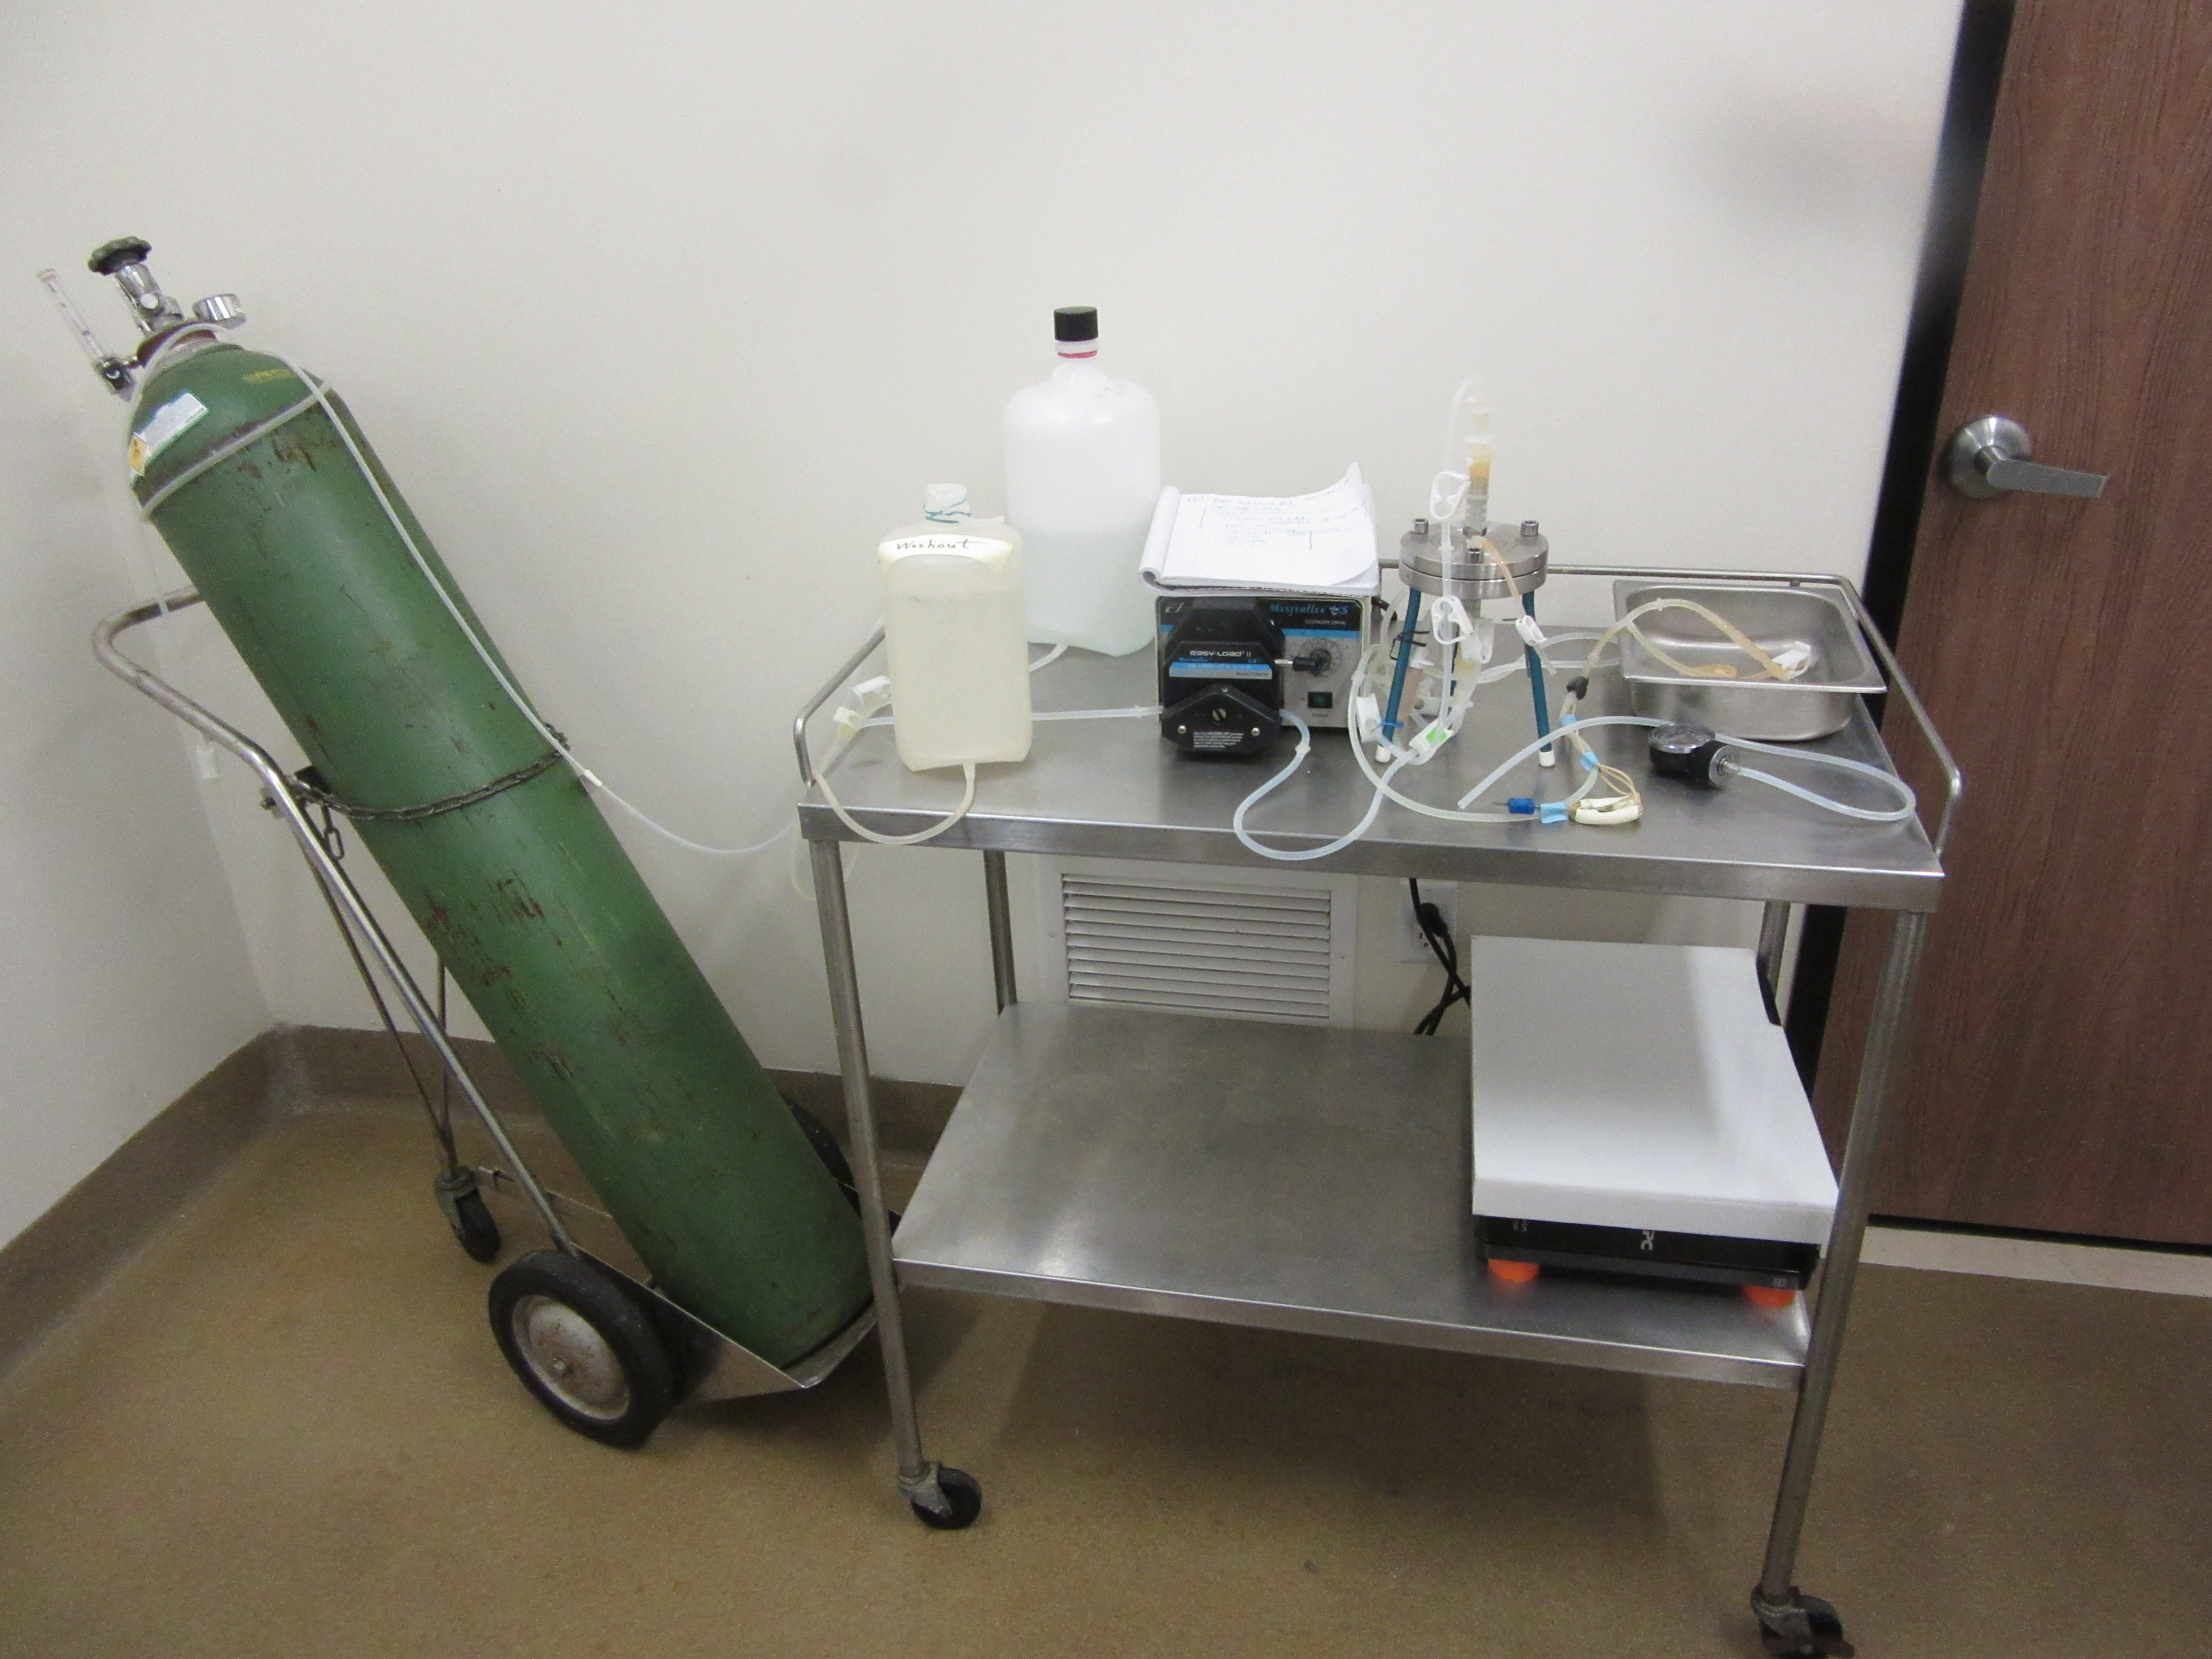
Figure 9: This is my implementation of the washout circuit described above, which I call a "washout cart". At the left there is a large green oxygen tank, which I use to bubble oxygen through the washout solution, which is on the left side of the cart with a blue rubber band at the top. Behind the washout solution is a large bottle with about 2 liters of fixative solution with additives. The two bottles connect together at a "T" junction which feeds into the masterflex pump in the center of the cart. This masterflex pump is an "economy drive" and is controlled entirely by hand using the dial on the front face. Next in the circuit is the filter (the large stainless steel disk supported by three blue legs), which is a Millipore 90mm filter holder containing a 0.22 micron filter. Fluid continues to the cannulae, which are resting inside the metal tray on the right side of the cart. Near the cart is a simple aneroid manometer which is connected to a "T" junction near the cannulae via a long sprial of tubing; it's used to measure the pressure during perfusion. At the bottom shelf of the cart is a standard uninterruptable power supply (UPS) which can keep the cart's pump running for about 30-40 minutes without needing to be plugged in to a wall socket. Because of the UPS, the cart can be moved to another room without disrupting the perfusion. The heat exchanger shown in the washout diagram is not present in this setup.
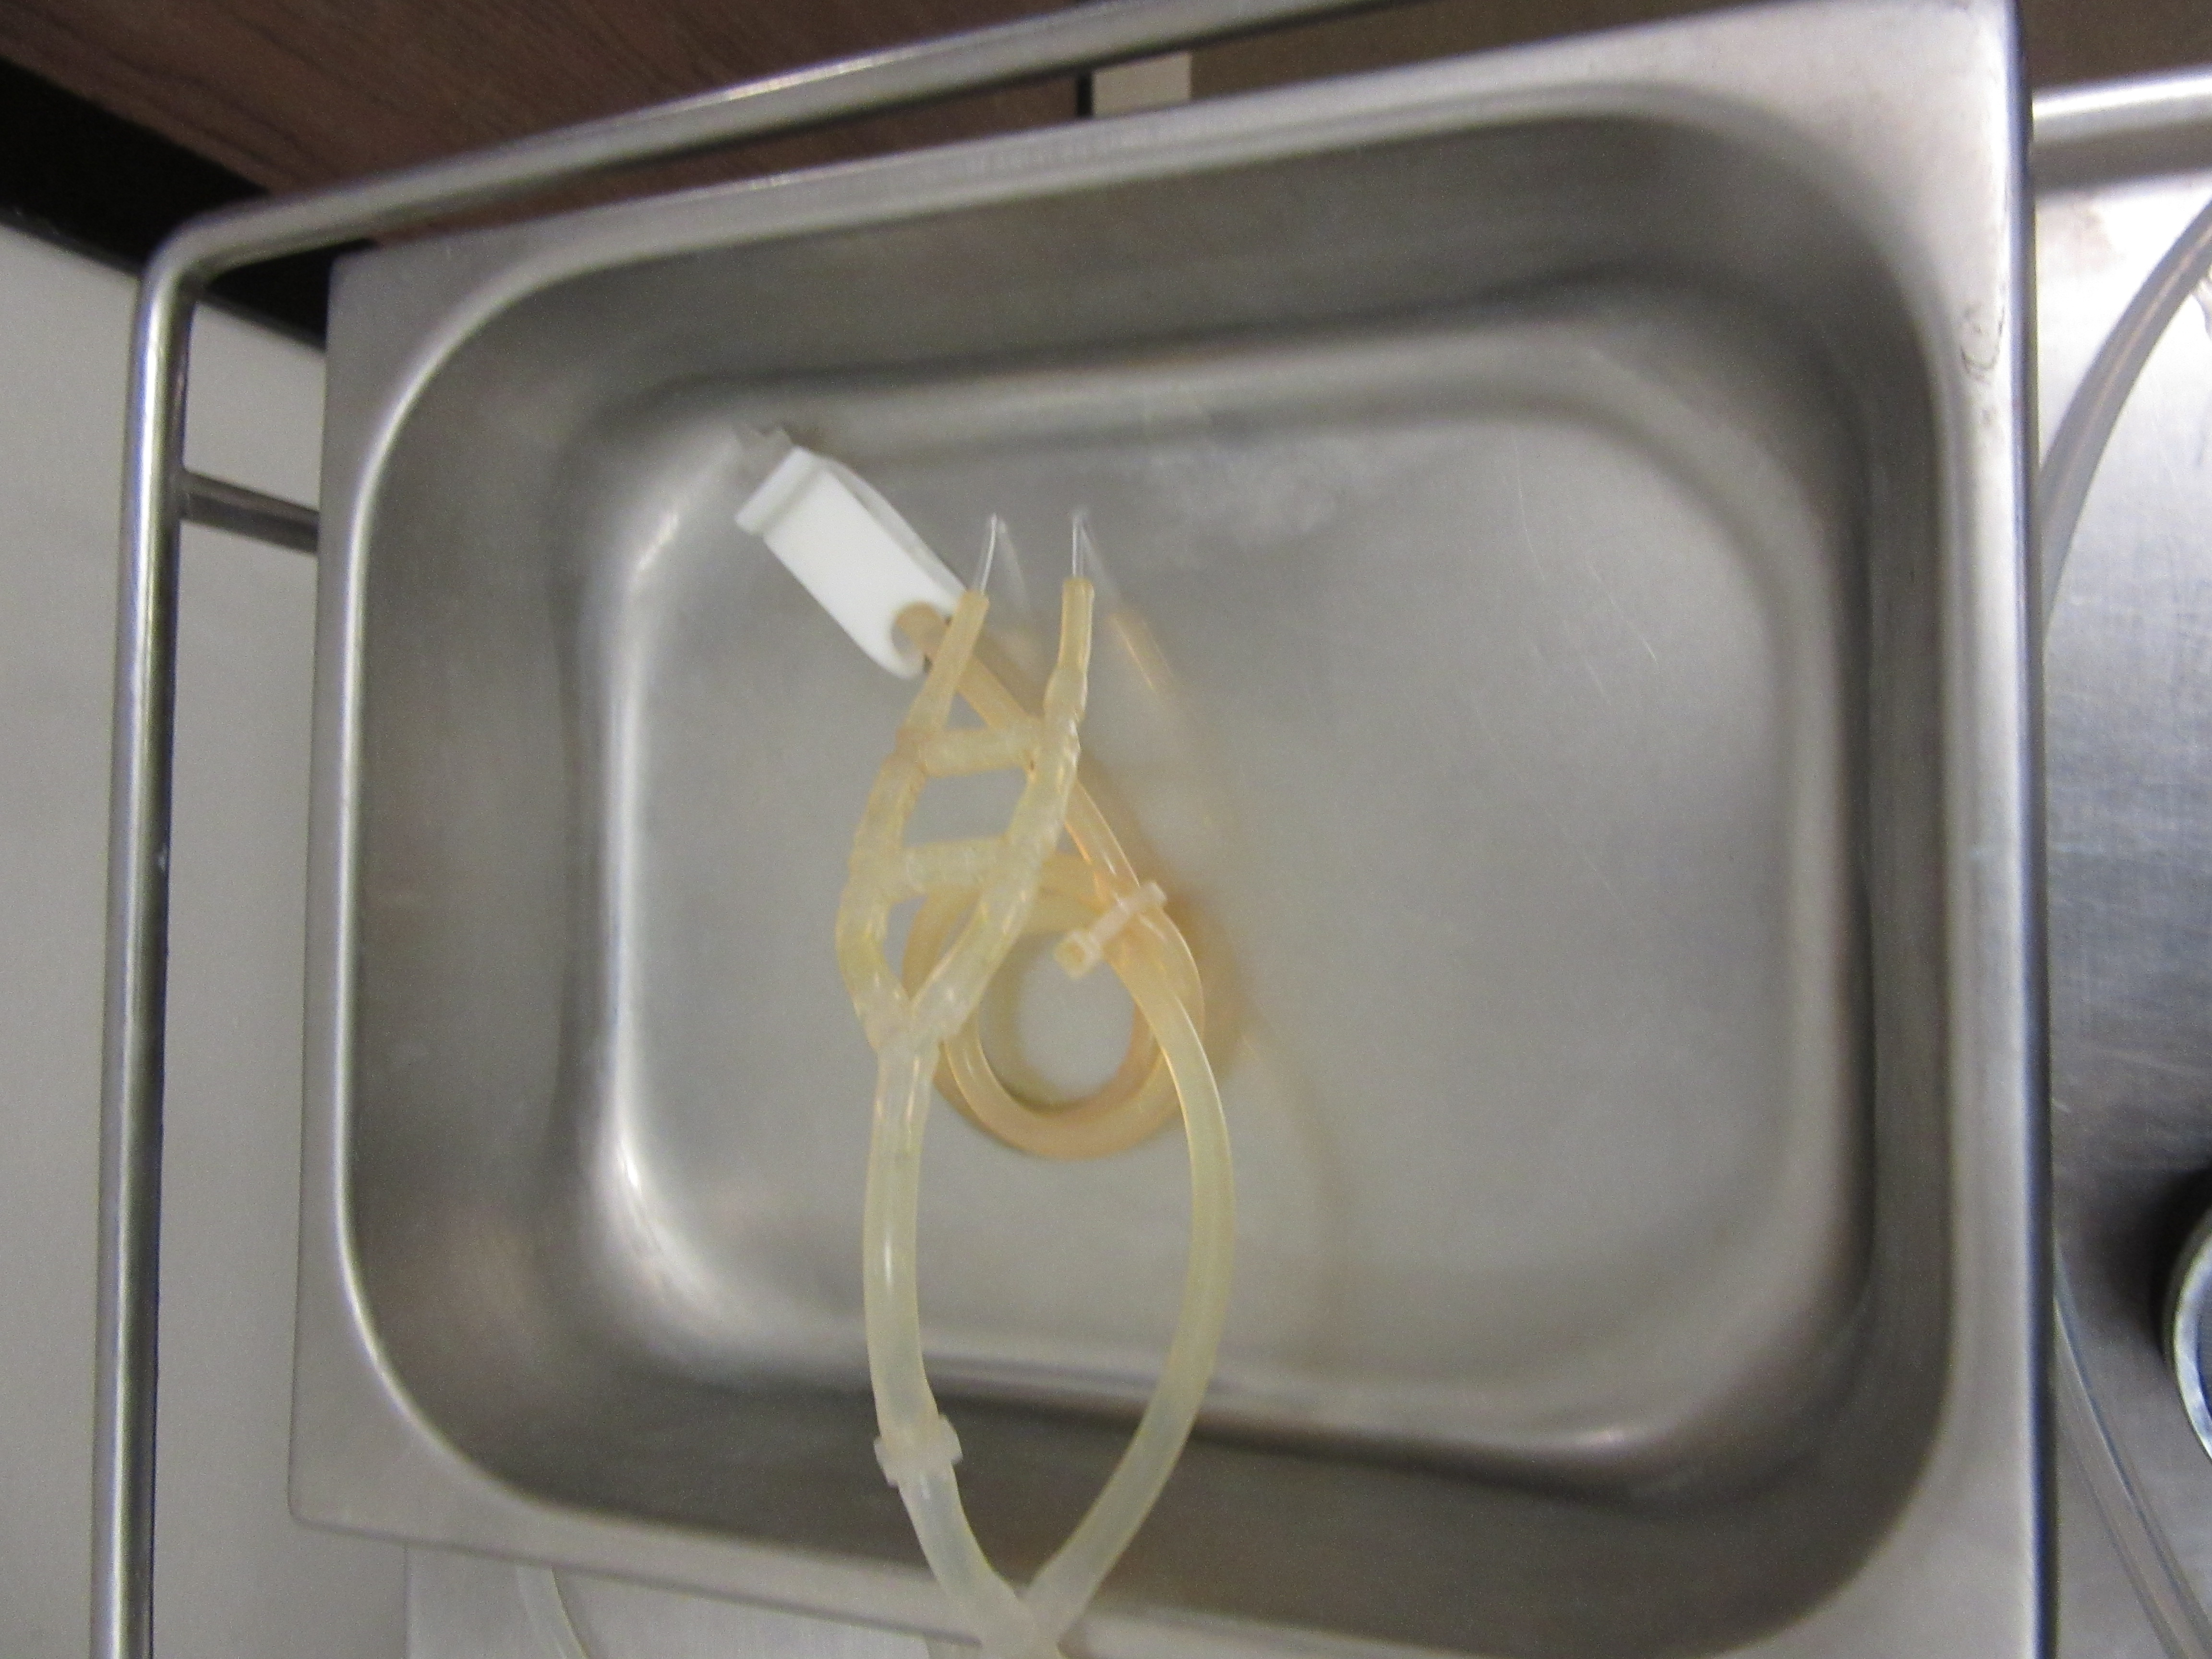
Figure 10: This is a close-up view of the rabbit cannulae which are also visible in the washout cart. The two cannulae at the end are made from catheter tubes; the rest of the "stepladder" design is made from standard L/S #14 tubing and connectors. The two "crossbars" are there to provide mechanical support. There is a long spiral of tubing which ends in a clamp, which splits off from the line at a "T" connector just before the start of the "stepladder" arrangement. This spiral is primed with washout solution and then connected to the manometer via an air-filled tube. The spiral is long enough and contains enough cushioning fluid that there is no chance of accidentaly embolizing the brain with air.

Figure 11: This recirculating cryoprotectant circuit is used to introduce cryoprotectant slowly into the fixed brain. Fluid flows from the recirculating reseviour (labeled "FIX" here), through a filter, into the rabbit's brain, and then drips down from the jugular veins back into the recirculating reseviour. The recirculating reseviour initially contains fixative without additives . Connected to this reseviour is another reseviour containing CPA solution . Both containers hold the same level of fluid and are connected together with a short piece of tubing. As the fluid flows through the circuit, the WASTE pump very slowly discards fluid at a rate of around 12.5 mL/min. Removing fluid causes CPA to flow from the CPA reseviour into the recirculating reseviour so that the levels of the two reseviours are always equal. Slowly, the concentration of CPA rises from 0% to full strength. Each reseviour contains 1.5 liters of solution, and at a rate of 12.5 mL/min discard it takes around 4 hours to complete the cryoprotectant ramp. The computer monitors perfusion pressure using a digital manometer. As the viscosity ofthe solution increases, the computer decreases the speed of the recirculating pump to maintain the pressure at 100mmHg.

Figure 12: This is the physical implementation of part of the gradient former described above. At the far left, surrounded in black foam and white tape and connected to a spiral of tubing, is an digital manometer connected to a monotoring computer. Near the digital manometer are three computer-controlled masterflex pumps: the top one is the main recirculating pump, the middle one is the waste pump, and the bottom one is not used in this configuration. The leftmost acrylic container is the recirculating resivour. The rabbit head rests on top of this resivour in the yellow container while it is being perfused. The acrylic container next to the recirculating reseviour holds the CPA solution. Both reseviours are sitting on a powerful magnetic stir plate which ensures that the cryoprotectant and fixative solutions are constantly mixed. The large acrylic reseviour in the front is the waste container. This entire setup is contained in a chemical fume hood to avoid exposure to glutaraldehyde fumes.
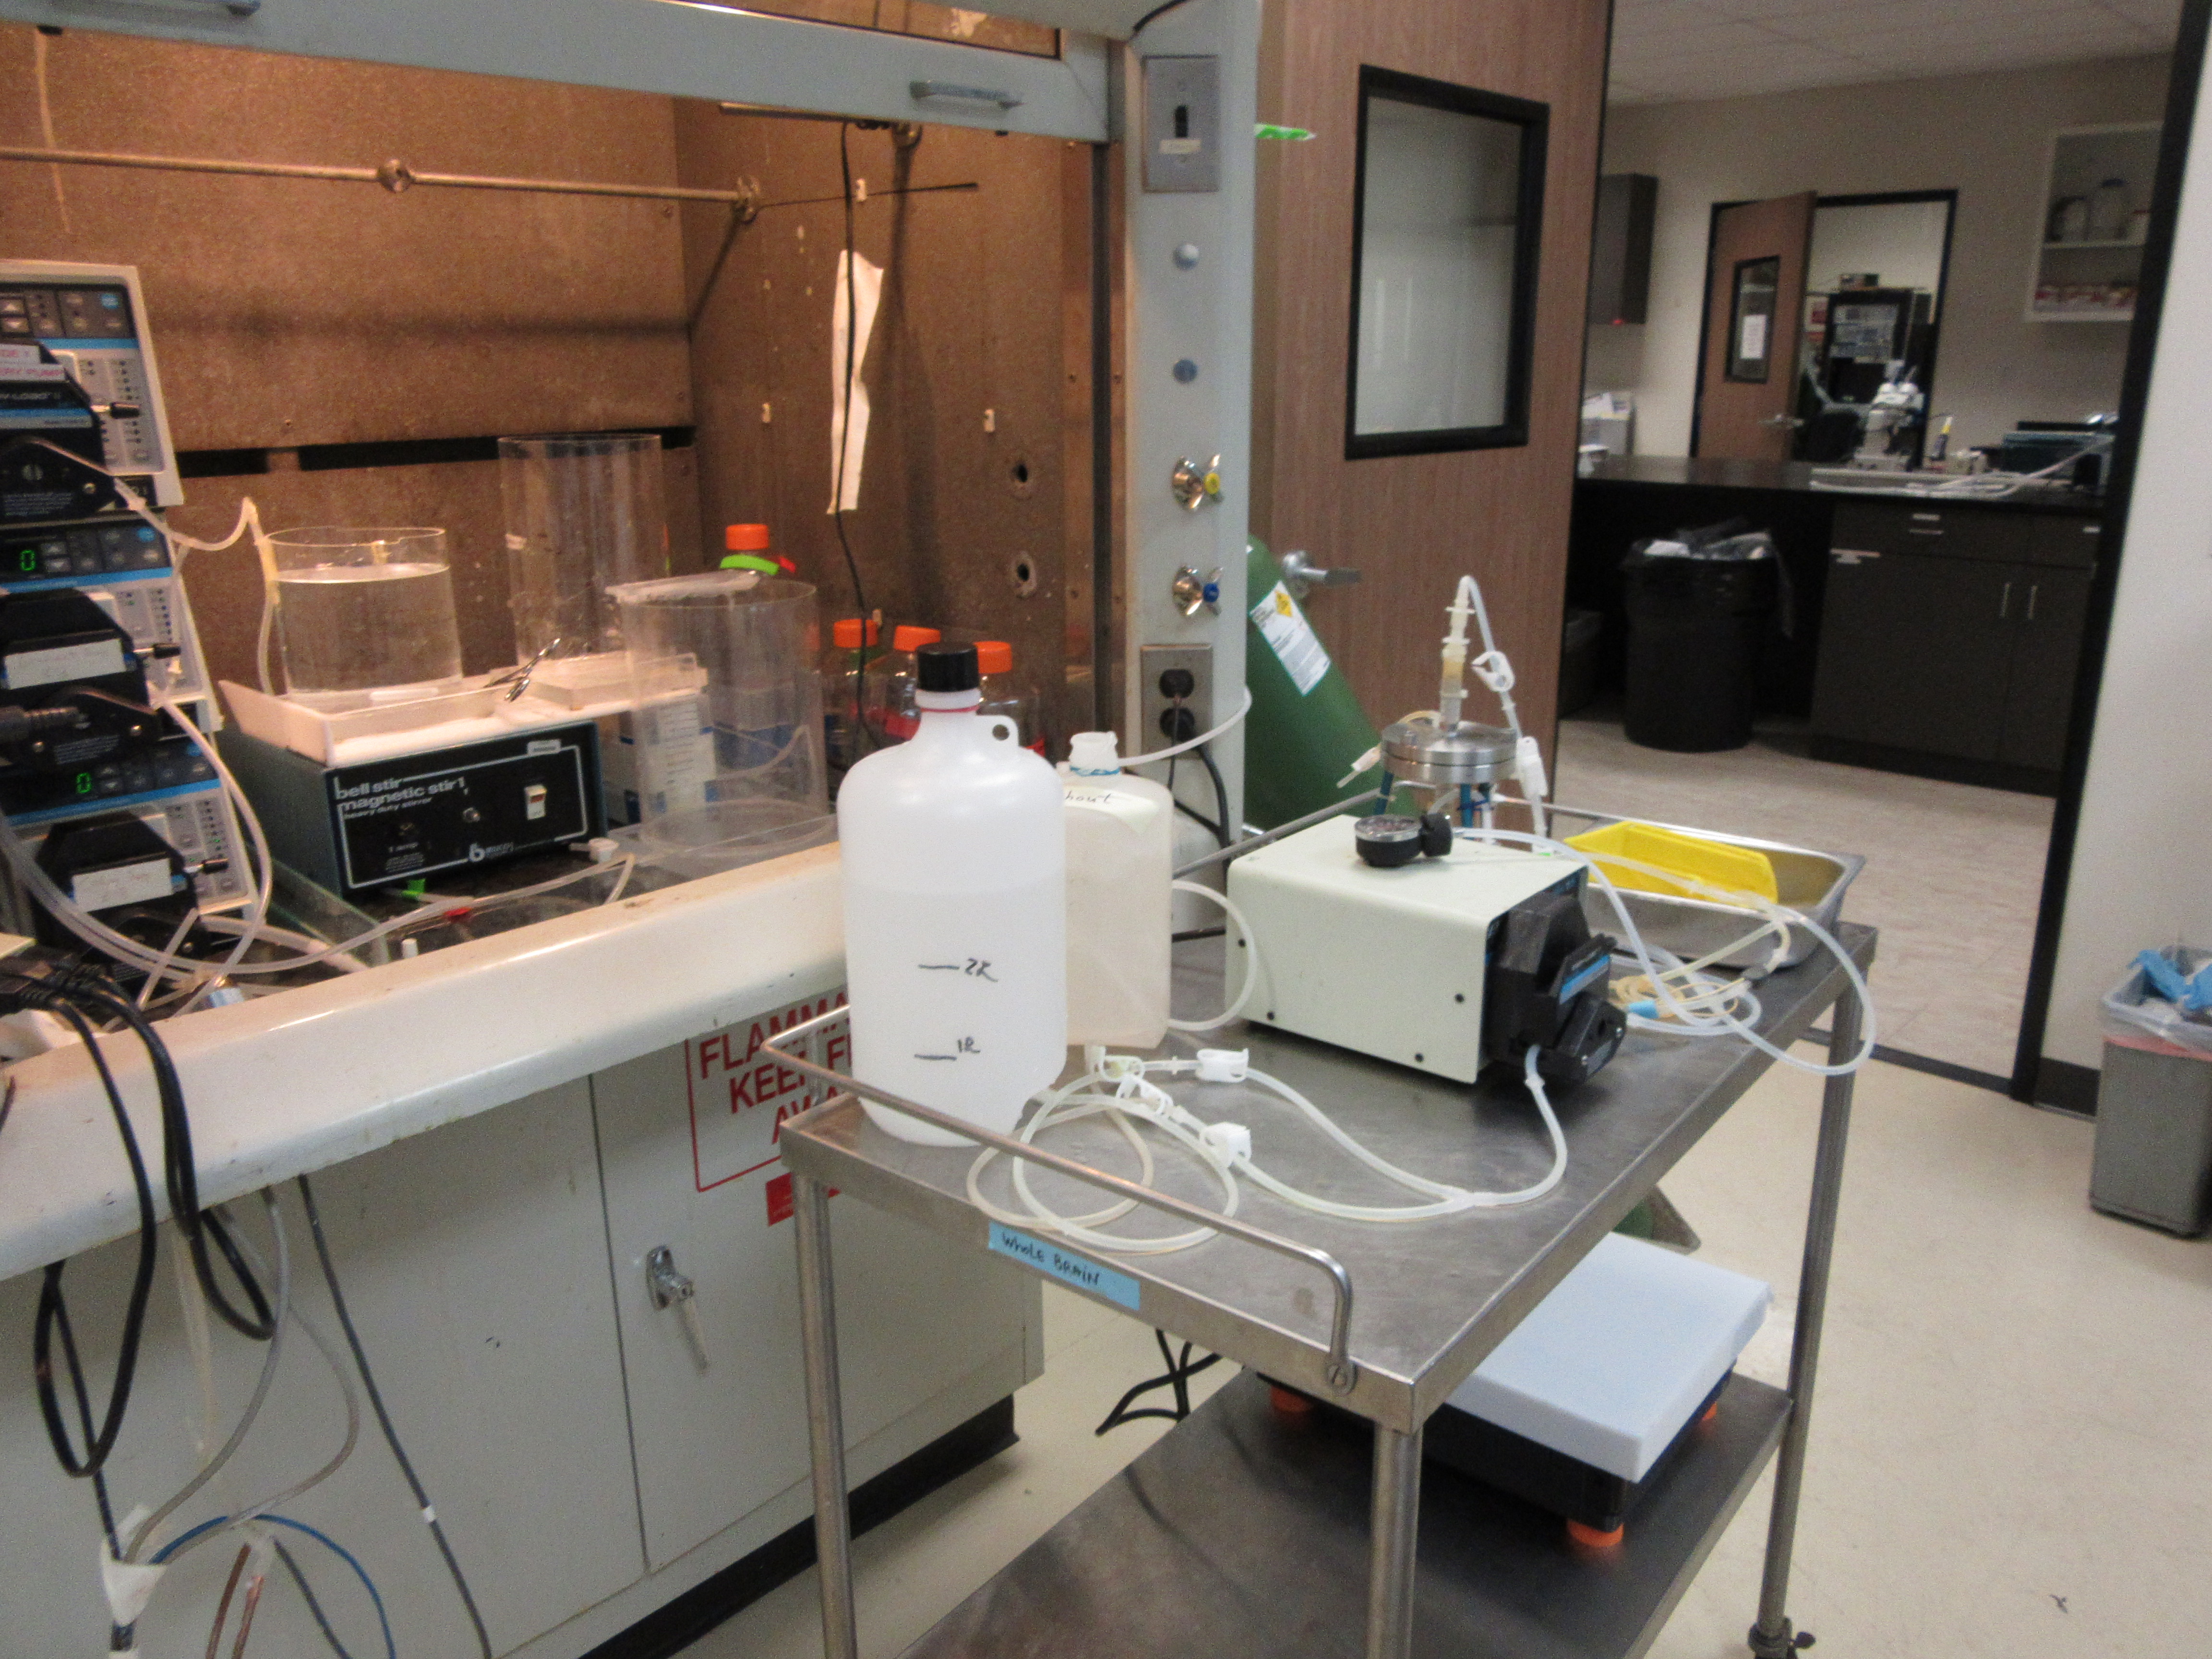
Figure 13: The washout cart and the gradient former combine together to form the complete gradient former circuit

Figure 14: The same basic circuit design was used to perfuse pigs, just with much larger containers and tubing than was used for rabbits. This is the washout cart and gradient former setup which was used to prepare the pig brains for submission to the Brain Preservation Prize.
Solutions
Master Chemical List
| Chemical | Supplier | Catalog/ID No. | price |
|---|---|---|---|
| Xylazine | Lloyd | 139-236 | |
| Isoflurane | Clipper | 57319-559-06 | |
| Ketamine | Putney | 26637-411-01 | |
| Euthasol | Virbac | 051311-050-01 | |
| Sodium Heparin | Hospira | 0409-2720-03 | |
| Chlorpromazine HCl | West Ward | 0641-1397-35 | |
| PBS 10x Concentrate | Fisher | BP665 | $3.53 / L |
| NaH2PO4 ⋅ 2 H2O | Sigma | 04269 | $0.0416 / g |
| Na2HPO4 ⋅ 2 H2O | Sigma | 30435 | $0.0711 / g |
| Glucose | Fisher | D16-10 | $0.0945 / g |
| NaCl | Fisher | S671-3 | $0.078427 / g |
| Sodium HEPES | Sigma | H7006 | $0.664 / g |
| NaHCO3 | Fisher | S233-3 | $0.0561 / g |
| K2HPO4 ⋅ 3 H2O | Sigma | P5504 | $0.152 / g |
| CaCl2 ⋅ 2 H2O | Sigma | C7902 | $0.0926 / g |
| MgCl2 ⋅ 6 H2O | Fisher | M35-212 | $0.22278 / g |
| Hydroxyethyl Starch | Serumwerk | 450/0.7 | |
| Glutaraldehyde | Fisher | BP25471 | $0.20383 / mL |
| Sodium Azide | Sigma | S2002 | $0.20375 / g |
| Sodium Nitrite | Sigma | S2252 | $0.0458 / g |
| Sodium Dodecyl Sulfate | Sigma | L3771 | $0.458 / g |
| Ethylene Glycol | Spectrum | E1051 | $0.04995 / mL |
| Agar | Sigma | 05039 | $0.276 / g |
| Sodium Cacodylate, 0.2 Molar | EMS | 11652 | $0.08 / mL |
| K4Fe(CN)6 ⋅ 3 H2O | Sigma | P3289 | $0.1976 / g |
| OsO4 (4% Solution) | EMS | 19150 | $2.65 / mL |
| Uranyl Acetate Dihydrate | EMS | 22400 | $6.20 / g |
| Absolute Ethanol | EMS | 15055 | $0.037778 / mL |
| Propylene Oxide | EMS | 20401 | $0.098 / mL |
| SPURS Embedding Kit | EMS | 14300 | $0.073514 / mL |
PBS Washout Solution
| Chemical | Concentration |
|---|---|
| PBS 10x Concentrate | 1x |
| Ketamine | 5.40 mL/L |
| Sodium Heparin | 0.50 mL/L (500 Units/L) |
| Cost | $0.50 / liter |
KRH8 Washout Solution
| Chemical | Concentration |
|---|---|
| Hydroxyethyl Starch | 60.00 g/L |
| NaCl | 7.59 g/L |
| Glucose | 1.8 g/L |
| Sodium HEPES | 1.30 g/L |
| MgCl2 | 1.017 g/L |
| CaCl2 | 0.169 g/L |
| K2HPO4 ⋅ 3 H2O | 0.51 g/L |
| NaHCO3 | 0.42 g/L |
| Ketamine | 5.40 mL/L |
| Sodium Heparin | 0.50 mL/L |
| Chlorpromazine HCl | 0.43 mL/L |
| Cost | $1.60 / liter |
Fixative Solution
| Chemical | Concentration |
|---|---|
| Na2HPO4 ⋅ 2 H2O | 14.65 g/L |
| NaH2PO4 ⋅ 2 H2O | 2.76 g/L |
| Glutaraldehyde | 3% w/v |
| Cost | $13.40 / liter |
Fixative Additives
| Chemical | Concentration |
|---|---|
| Sodium Dodecyl Sulfate | 0.01% w/v |
| Sodium Azide | 0.1% w/v |
| Cost | $0.25 / liter |
Cryoprotectant Solution
| Chemical | Concentration |
|---|---|
| Na2HPO4 ⋅ 2 H2O | 14.65 g/L |
| NaH2PO4 ⋅ 2 H2O | 2.76 g/L |
| Glutaraldehyde | 3% w/v |
| Ethylene Glycol | 65% w/v |
| Cost | $45.90 / liter |
Cost considerations
You can buy automotive antifreeze concentrate for $0.00237 / mL, a factor of 20x cheaper than the biological-grade ethylene glycol. This lowers the cost of the CPA solution considerably to around $15.00 / liter.
At that point, the main expense making these solutions is the glutaraldehyde. I don't personally know of a very cheap source of glutaraldehyde, but it is used in the tanning industry to produce high-quality leather. It should be possible to reduce the glutaraldehyde cost by at least a factor of 5, bringing down the cost of these solutions to around $1-$3 / liter. If you find a good source for these chemicals which still yields excellent electron micrographs, let me know at <r at nectome dot com>!
Detailed ASC protocol
Surgery and blood washout
First, induce anesthesia in the rabbit / pig with an injection of 50 milligram per kilogram animal mass Ketamine and 5 milligram per kilogram animal mass Xyalazine. Over the course of around 10 minutes, the animal will stop moving and be in a very deep sleep. Note that Ketamine is a Schedule III controlled substance in the United States and you will need a licensed veterenarian and appropriate institutional drug-handling protocols to use it.
Transfer the animal to a respirator and provide 1% – 5% isoflurane mixed with 100% oxygen to achieve a deep plane of surgical anesthesia. The animal should be unresponsive to the "toe pinch test" at this point. See Boston University's guide for more details.
Once the animal is fully anesthestized, make a incision in the neck and carefully free each carotid artery form the surrounding tissue. Tie loose suture thread around each carotid in preparation for cannulation. Once both carotids have been isolated and the suture thread is ready, make a tiny nick in the left carotid with a pair of micro Metzenbaum scissors, quickly insert a cannula into one of the carotids, and firmly tie the carotid onto the canula with the suture thread. Once the cannula is secure, engage the washout pump and adjust the flow rate to maintain a pressure of 100mmHg. Maintain 100mmHg pressure throughout the rest of the perfusion. Cut the left jugular vein, then move on and repeat the cannulation procedure for the right carotid, then after the right cannula is secure, cut the right jugular vein. At this point, you have complete control of the circulation through the animal's entire head and will be washing blood out of the brain through the jugulars with oxygenated washout solution at room temperature. You should be careful to wash all the blood out of the brain completely before starting fixation. In my experience, total blood washout takes around 2-5 minutes regardless of species.
Initial fixation
Once you've washed all the blood out of the animal's brain, switch over to fixative with additives to begin the fixation process. The rabbit's ears will begin to stiffen from the glutaraldehyde, and you might notice some fixation tremors as well. It's very important to perfuse the brain with full-strength fixative immediately at the start of fixation! Otherwise, you will cause excessive myelin-figures and popcorn mitochondria in the final electron micrographs (Minassian-1979). In my setup, I have an inline filter between the perfusate reseviors and the cannulae. At the typical flow rates for my system, it can take almost 3 minutes for the dead volume in the filter to completly transition from washout solution to fixative solution. These three minutes while the glutaraldehyde concentration increases from 0% to its final concentration of 3% are sufficient to impair the fixation quality! To avoid the delay, I prefiltered the fixative solution and bypassed the filter using a set of switches at the start of fixation. Bypassing the filter allows the glutaraldehyde to increase to full strength in only a few seconds, resulting in a high quality fixation.
Oddly enough, glutaraldehyde has no osmotic effect on cells, so it's no problem at all to rapidly transition from 0% glutaraldehyde to 3% glutaraldehyde. Glutaraldehyde permanently inactives all electrical activity in the brain within seconds REFERENCE, so the rabbit will be brain-dead after initial exposure to glutaraldehyde. Up to the start of fixation, it's theoritically possible to carefully reintroduce blood to the brain, surgically repair the carotids and jugulars, stitch the animal's neck back together, and fully recover the animal to conciousness. As of 2015, it's not possible to reverse glutaraldehyde fixation in any meaningful way.
Transfer to the graident former
During initial fixation, you should continue to maintain the perfusion pressure at 100mmHg, the same as during washout. After fixation has started, sever the remaining muscles in the rabbit's neck, cut away the skin around the neck with scissors, and then cut through the verterbrae with a pair of shears. Carefully remove the head from the body and place it on the mobile perfusion cart. Roll the cart to the recirculating cryoprotectant gradient former and transfer the head onto the waste reseviour.
As long as the rabbit head remains on the waste reseviour, you will be perfusing open-circuit. Your next task is to condition the inline filter by removing all the washout solution currently inside it and replacing it with fixative solution. Use the computer-controlled pump to clear the filter and send the remaining washout solution directly to the waste reseviour. The rabbit head will continue to be perfused in parallel by the washout cart pump. Then, replace the manual manometer with the digital manometer and join the two fluid paths. After ensuring at least 12 minutes of open circuit perfusion with the fixative with additives, slowly decrease the speed of the manual pump on the washout cart. The computer will slowly increase the speed of the computer-controlled pump to compensate, and eventually you will have completely deactivated the manual pump and the entire system will be under computer control, with all fluid again flowing through the inline filter. Carefully move the rabbit head from the waste reseviour to the recirculating reseviour to begin recurculation.

Figure 15: Diagram showing how to transition from open circuit to closed circuit without disrupting flow to the rabbit cephalon.
Cryoprotectant introduction
For the brains which I submitted to the BPF, I perfused fixative with additives for 12 minutes open circuit, fixative without additives for 3 minutes open circuit (to clear away the additives before recirculation), normal fixative recirculating for 30 minutes, and then I started the discard pump, opened the connection between the recirculating reseviour and CPA reseviour, and linearly increased the CPA concentration from 0% to full strength over the course of 4 hours. For good measure, I then refilled the recirculating reseviour with full-strength CPA solution and perfused for another 45 minutes, followed by open-circuit perfusion of fresh CPA solution for a final 15 minutes to ensure complete cryoprotection. The exact timing of each of these steps is one of the least optimized parts of the ASC protocol; I started with a very conservative schecule for fixation and CPA introduction, found that it worked, and then never had enough time to optimize it further. Each of these steps can probably be done much faster. My stab at an optimized protocol would be: 10 minutes open circuit fixative w/ additives, 90 minutes exponential ramp from 0% CPA to full-strength CPA, and then 10 minutes of open-circuit full strength CPA. If you do find a faster protocol that works, I'd love to hear about it at <ASC at aurellem dot org>.
Vitrification
Simply place the rabbit head (or just the brain) in a biological freezer set to -135°C, and wait around 10 hours for the brain to vitrify. Vitrified brains can be stored indefinately without any structural decay (that's sort of the point of all this!).
If you are vitrifying brains removed from their protective skulls, be sure to immerse them in cryoprotectant solution before vitrification. Otherwise, water from the air can condense onto the brain's surface and form ice crystals during rewarming.
To rewarm brains, just set them out at room temperature for about 30 minutes.
Here you see the rabbit brain from BPF Submission #6 being vitrified on September 25, 2015.
The brain floats freely in the cryoprotectant solution. I lower the cup into a 21st Century Medicine controllable isothermal vapor storage freezer (CIVS) set to -135°C, and allow the brain to vitrify overnight.
This brain is from the rabbit which Dr. Hayworth and Michael Shermer witnessed and which Shermer wrote about in Scientific American and which Hayworth extensively imaged as part of this evaulations for the Brain Preservation Prize.
The next day, we removed the rabbit brain from storage and found it to be completely sold. The brain in the cup is at -135°C, colder than anything that naturally occurs on earth!
So that we could clearly see the brain, we dipped the cup of vitrified cryoprotectant in a small cup of methanol before taking this video. The coating of methanol prevents any ice form forming on the surface of the cup and obscuring the brain.
Over the next 10-15 minutes, this brain warmed to room temperature, and was ready to be embedded in agar and sliced on a vibratome.
References
Engines of Creation. Eric. Drexler, 1986. (full-text-html, full-text-pdf, local-backup)
See Engines of Creation – Chapter 9, under "Methods for Biostasis" for a description of ASC. The only real difference between my protocol and the one described in the book is the blood washout step and the use of SDS to open the blood brain barrier.
I described… simple molecular devices able to enter cells, block their molecular machinery, and tie structures together with stabilizing cross-links. Glutaraldehyde molecules fit this description quite well.
Chemicals such as propylene glycol, ethylene glycol, and dimethyl sulfoxide can diffuse into cells… If they replace enough of a cell's water, then cooling doesn't cause freezing, it just causes the protectant solution to become more and more viscous… the process of solidification without freezing is called vitrification.
…Fixation and vitrification together seem adequate to ensure long-term biostasis.
- Aldehyde-stabilized cryopreservation. Robert L. McIntyre, Gregory M. Fahy. Cryobiology Volume 71, Issue 3, December 2015, Pages 448–458 (full-text, local-backup)
- Changes in the permeability of the blood-brain barrier following sodium dodecyl sulphate administration in the rat. Antonella Saija, Pietro Princi, Domenico Trombetta Maria Lanza, Anna De Pasquale. Exp Brain Res (1997) 115:546–551 (local-backup)
- Method of Cryopreservation of Whole Brains. Yuri Pichugin. Provisional Patent Application, 2007. (local-backup)
- Thermodynamic aspects of vitrification. Brian Wowk. Cryobiology 60 (2010) 11–22 (full-text, local-backup)
- Effect of sodium azide on the ultrastructural preservation of tissues. Hassmig Minassian and Shao-Nan Huang. Journal of Microscopy, Vol. 117, Pt. 2, November 1979, pp. 243-253. (local-backup)
- The Impurities in Commercial Glutaraldehyde and Their Effect on the Fixation of Brain. E. Arthur Robertson and Robert L. Schultz. J. Ultrastructure Research 30, 275-287 (1970) (local-backup)
- Glutaraldehyde. The Influence of pH, Temperature, and Buffering on the Polymerization Rate. Knud-Erik Rasmussen and John Albrechtsen. Histochemistry 38, 19–26 (1974) (local-backup)